Food photography has evolved into an essential skill for chefs, food bloggers, and culinary enthusiasts who wish to capture the beauty and allure of their creations. While indoor setups provide controlled lighting and environment, taking your food photography outdoors can add a fresh, dynamic element to your shots. The natural light, vibrant surroundings, and authentic backdrops can enhance the visual appeal of your dishes, making them stand out.
However, outdoor food photography comes with its own set of challenges, from dealing with changing light conditions to finding the perfect setting. Whether you’re photographing a picnic spread in a park, a barbecue in the backyard, or a farm-to-table feast, mastering outdoor food photography requires careful consideration and planning. In this article, we will explore seven essential tips that will help you capture stunning food photos in outdoor settings, ensuring that your culinary creations look as delicious as they taste.
Embrace Natural Light
Natural light is one of the most significant advantages of shooting food photography outdoors. It adds a soft, authentic glow to your photos, enhancing the colors and textures of your dishes. To make the most of natural light, avoid shooting in direct sunlight, which can create harsh shadows and overexposed highlights. Instead, opt for the golden hours—shortly after sunrise or before sunset—when the light is soft and warm. If you’re shooting during midday, look for shaded areas or use a diffuser to soften the light. Reflectors can also help bounce light back onto the subject, reducing shadows and adding depth to your images.
Choose the Right Background
The background plays a crucial role in outdoor food photography, as it sets the scene and adds context to your shot. When selecting a background, consider the overall theme and mood you want to convey. For example, a rustic wooden table can complement a hearty country meal, while a grassy field can enhance a fresh, summery dish. Keep the background simple and uncluttered to ensure the focus remains on the food. Natural elements like trees, flowers, or even a distant skyline can add depth and interest without distracting from the main subject.
Use Props Wisely
Props can elevate your food photography by adding narrative and style to your images. In outdoor settings, consider using natural elements like fresh produce, herbs, or flowers as props to create a cohesive and organic look. Picnic blankets, rustic tableware, and wooden cutting boards can also enhance the outdoor ambiance. However, be mindful not to overuse props, as they can easily overwhelm the scene. The key is to complement the food without distracting from it. Arrange your props in a way that guides the viewer’s eye toward the main dish, creating a balanced and visually appealing composition.
Pay Attention to Composition
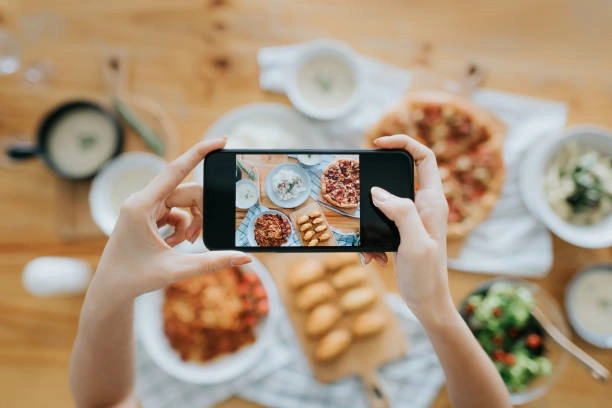
Composition is a fundamental aspect of any photography, and outdoor food photography is no exception. The rule of thirds, leading lines, and symmetry are all useful techniques to keep in mind when framing your shots. Experiment with different angles and perspectives—shooting from above can capture a flat lay of a picnic spread, while a side angle might highlight the layers of a burger. Don’t be afraid to get close and focus on the details, such as the texture of a cake or the condensation on a cold drink. A well-composed image will draw the viewer’s attention and make the food look irresistible.
Consider the Weather
Weather can be both a friend and a foe in outdoor food photography. While a bright, sunny day can provide ample light, it can also lead to harsh shadows and overexposure. On the other hand, overcast days offer soft, diffused lighting that’s ideal for capturing food in a natural, flattering way. Be prepared to adapt to changing weather conditions by bringing along portable reflectors, diffusers, and even a small tent or umbrella to shield your setup from sudden rain or wind. Remember, the weather can also set the mood for your photos—a slight drizzle might add a cozy, intimate feel to a hot soup shot.
Keep It Fresh
When shooting food outdoors, freshness is key. The elements can quickly affect the appearance of your dishes, especially in warm weather. Cold dishes may start to melt, while hot dishes can cool down and lose their appeal. To keep your food looking fresh, prepare your dishes just before the shoot and have everything ready to go. Consider bringing a cooler or insulated containers to keep cold items chilled, and have a plan to keep hot dishes warm until you’re ready to shoot. Working quickly and efficiently will ensure your food looks as appetizing in photos as it does in real life.
Tell a Story
One of the most powerful aspects of food photography is its ability to tell a story. When shooting outdoors, think about the narrative you want to convey through your images. Are you capturing a casual picnic with friends, a romantic dinner, or a bustling farmers’ market scene? The story you want to tell will guide your choice of location, lighting, props, and composition. Incorporate elements that evoke a sense of place and time, and focus on the emotions and experiences associated with the meal. A well-told story will not only make your photos more engaging but also connect with your audience on a deeper level.
Outdoor food photography offers a unique opportunity to combine the beauty of nature with the artistry of culinary presentation. By embracing natural light, choosing the right background, and carefully considering composition, you can create images that are not only visually stunning but also tell a compelling story. Whether you’re a seasoned food photographer or just starting, these tips will help you navigate the challenges of shooting outdoors and elevate your food photography to the next level.
Remember, the key to successful outdoor food photography lies in preparation, adaptability, and creativity. With the right approach, you can capture the essence of a dish in its natural environment, making your photos as inviting and delicious as the food itself. So, grab your camera, head outside, and let the natural world inspire your next culinary masterpiece.
Recommendations for Photography Equipment
Torjim Softbox Photography Lighting Kit

- What We Like
- High-Quality Material
- Energy Efficient
- Versatile Lighting
- Durable and Stable
- What We Don’t Like
- Time-consuming Manual Setup
- Bulky and Less Portable
- Requires Power Outlet

- What We Like
- Remote Control Convenience
- Versatile Applications
- Impressive Smoke Output
- Safety and Reliability
- What We Don’t Like
- Limited Smoke Capacity
- Potential Battery Dependence
- Area Coverage Limitation
VILTROX LED Photography Light Kit

- What We Like
- Brightness Adjustment
- Ease of Use
- LCD Display
- Soft Diffuser Surface
- What We Don’t Like
- Limited Brightness Range
- No Advanced Features
- Limited Color Temperature

- What We Like
- Superior Protection
- Customizable Interior
- Durable and Secure
- Versatile Use
- What We Don’t Like
- Limited Space
- Potential Overcomplication
- Price Point
The K&F Concept Camera Backpack offers top-tier protection and versatility for photographers on the go. Engineered with thick inner padding and a shockproof design, it ensures your camera gear stays safe from impacts. The customizable interior, featuring a 180° front EVA hard shell with multi-compartment design, allows for easy organization tailored to various shooting scenarios. Made from water-resistant 1000D nylon with high-strength stitching and anti-theft zippers, this backpack is built for durability and security.
It also features a top compartment for essentials, a bottom section for tripods, and a back pocket that fits a 16-inch laptop. With widened, thickened shoulder straps for comfort, plus a rain cover and luggage strap, this backpack is an ideal companion for photography, hiking, and travel adventures.







Leave a Reply