Food photography is an art that combines culinary skills with visual storytelling. The goal is to make viewers’ mouths water and evoke a sensory experience that goes beyond taste. Whether you’re a food blogger, a chef, or just someone who loves capturing the beauty of their meals, understanding the basics of food photography can transform your images from ordinary to extraordinary. Here’s a detailed guide to get you started.
1. Understanding Your Equipment
- Camera: While a DSLR or mirrorless camera with interchangeable lenses is ideal, modern smartphones also have excellent cameras that can produce stunning results. Familiarize yourself with your camera settings, especially manual mode, to control exposure, aperture, and ISO.
- Lenses: A macro lens is great for capturing detailed shots of food, while a standard 50mm lens offers a natural perspective. A wide-angle lens can be useful for capturing more of the scene in a single shot. Like my current equipments: Canon EF-S10-18 IS STM,Sony – FE 50mm F1.8 Standard Lens.
- Tripod: Using a tripod ensures stability and allows for longer exposure times without blurring. It’s especially useful in low-light conditions or when you need to set up precise compositions.
2. Mastering Lighting
- Natural Light: Natural light is your best friend in food photography. It’s soft, diffused, and brings out the natural colors of the food. Set up your scene near a large window, preferably with indirect sunlight.
- Artificial Light: If natural light isn’t available, use softboxes or LED lights with diffusers to mimic natural lighting. Position the light source at a 45-degree angle to the food to create depth and highlight textures.
- Reflectors and Diffusers: Use reflectors (white foam boards, silver or gold reflectors) to bounce light back onto the food, filling in shadows and creating an even exposure. Diffusers (sheer curtains, softboxes) help soften harsh light and reduce glare.
3. Setting the Scene
- Backgrounds: Choose backgrounds that complement the food without distracting from it. Wooden boards, marble slabs, or plain colored backdrops work well. Avoid overly busy patterns that can clash with the food.
- Surfaces: Consider the texture and color of the surface where the food is placed. A rustic wooden table adds warmth, while a sleek marble countertop gives a clean, modern look.
- Props: Props should enhance the story you’re telling without overshadowing the main subject. Use relevant items like cutlery, napkins, and ingredients to add context. Keep the props simple and cohesive with the overall theme.
4. Composition Techniques
- Rule of Thirds: Divide your frame into a 3×3 grid and place the main elements along the grid lines or at the intersections. This creates a balanced and engaging composition.
- Leading Lines: Use lines within the frame (such as a fork, a knife, or the edge of a plate) to guide the viewer’s eye towards the main subject.
- Symmetry and Patterns: Symmetrical compositions and repeating patterns can be visually pleasing. Arrange similar items in a balanced way to create a harmonious scene.
- Negative Space: Leaving empty space around the food can help highlight it and make the image feel less cluttered. Negative space gives the viewer’s eye a place to rest.
5. Capturing Textures and Details
- Close-Ups: Get close to your subject to capture the intricate details and textures of the food. A macro lens or the macro mode on your smartphone can be very useful here.
- Side Lighting: Lighting the food from the side helps to bring out textures and create depth, emphasizing the details.
- Depth of Field: Use a wide aperture (low f-number) to create a shallow depth of field. This blurs the background and brings the focus sharply on the food.
6. Editing and Post-Processing
- Basic Adjustments: Start with basic adjustments like exposure, contrast, and white balance. Ensure the colors are true to life and the image is well-lit.
- Cropping and Straightening: Crop the image to improve composition and remove any distracting elements. Straighten the image to ensure lines are level.
- Color Correction: Fine-tune the colors to enhance the visual appeal of the food. Be careful not to over-saturate, which can make the food look unnatural.
- Sharpening: Apply a touch of sharpening to make the details pop. Be subtle to avoid introducing noise or artifacts.
7. Telling a Story
- Narrative: Think about the story you want to convey with your image. Is it a cozy breakfast in bed, a vibrant summer salad, or an elegant dinner party? The story will guide your choice of lighting, composition, and props.
- Emotion: Evoke emotions through your images. Warm tones and soft lighting create a cozy, inviting feel, while bright, crisp images can evoke freshness and vibrancy.
- Context: Include contextual elements that give more information about the dish. For example, fresh ingredients scattered around, a cookbook in the background, or hands preparing the food can add depth to the story.
By mastering these basics of food photography, you’ll be able to create visually appealing and mouth-watering images that captivate your audience. Practice regularly, experiment with different techniques, and most importantly, have fun capturing the deliciousness!
Highly Recommended
Canon EOS Rebel T7 DSLR Camera
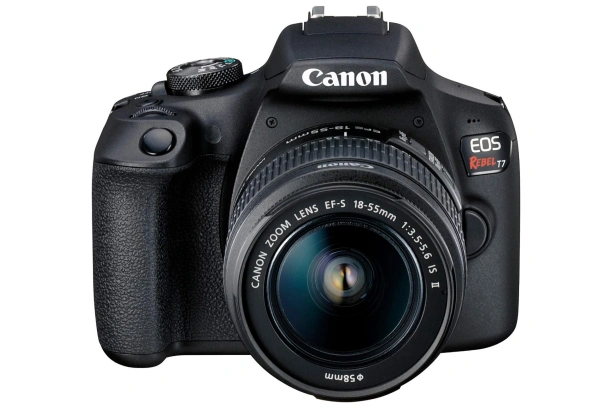
- What We Like
- High-Resolution Imagery
- Wireless Connectivity
- Full HD Video Capabilities
- Interchangeable Lens System
- What We Don’t Like
- Limited Image Processor
- Advanced Features
Capture life’s moments in stunning clarity with the Canon EOS Rebel T7 DSLR Camera. Equipped with an 18-55mm lens, built-in Wi-Fi, a 24.1 MP CMOS sensor, and DIGIC 4+ image processor, it delivers exceptional image quality and impressive performance.
From breathtaking stills to full HD videos, this camera empowers enthusiasts and budding photographers to explore their creativity. Its user-friendly interface and lightweight design make it a perfect companion for capturing unforgettable memories. Whether you’re delving into photography as a hobby or looking to upgrade your gear, the Canon EOS Rebel T7 is your gateway to professional-quality imaging, all in one remarkable package.
Canon EOS R100 Mirrorless Camera RF-S18-45mm
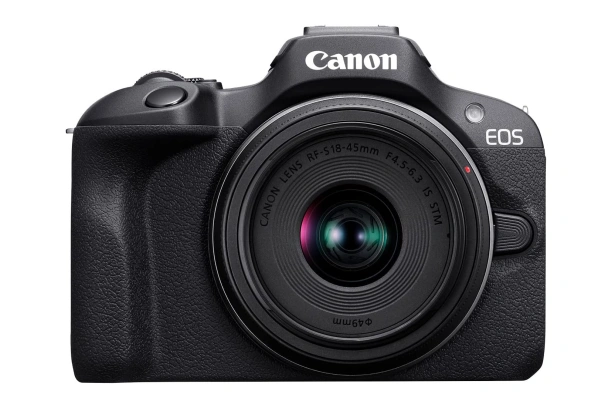
- What We Like
- High-Resolution Imagery
- Versatile Lens Kit
- 4K Video Capability
- RF Mount Compatibility
- What We Don’t Like
- Limited Lens Aperture
- Smaller Sensor Size
Embark on a journey of professional-grade photography with the compact and lightweight EOS R series camera, an enticing addition at an affordable price. Designed to prioritize exceptional mobility, it stands as the smallest and lightest body in the EOS R series, ensuring effortless portability without compromising on performance.
Boasting a 24.1 Megapixel CMOS (APS-C) sensor and DIGIC 8 processor, it delivers unparalleled image quality. With Dual Pixel CMOS AF spanning up to 143 zones, including auto subject detection and Eye Detection AF with Servo AF, this camera guarantees precise and swift focusing. Seize the moment with continuous capture of up to 6.5 shots per second in One-Shot AF mode, making it a reliable companion for capturing life’s fast-paced scenes.
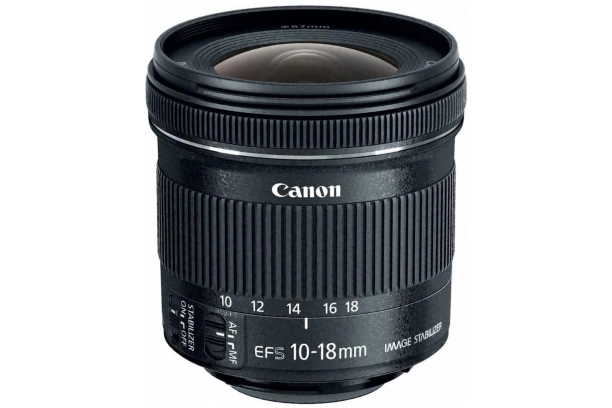
- What We Like
- Wide-Angle Capability
- Image Stabilization
- Lightweight and Compact Design
- Silent Autofocus
- What We Don’t Like
- Narrow Aperture Range
- Limited Compatibility
Unleash your creativity with the EF-S ultra wide zoom lens, a marvel of engineering that redefines wide-angle photography. Its cutting-edge lead screw and rack system, powered by a precision stepping motor, delivers unparalleled control and smoothness in operation. Boasting a focal length of 10-18mm and a maximum aperture of 1:4.5-5.6, this lens opens up a world of expansive perspectives while maintaining exceptional clarity and detail.
With a closest focusing distance of 0.72 feet (0.22 meters) and the integration of an optical image stabilizer, this lens ensures striking precision and stability, while the whisper-quiet stepping motor effortlessly facilitates noise-free video shooting, making it a versatile and reliable tool for both photography and videography enthusiasts.
K&F Concept 5-in-1 Light Reflector 32″(80cm)
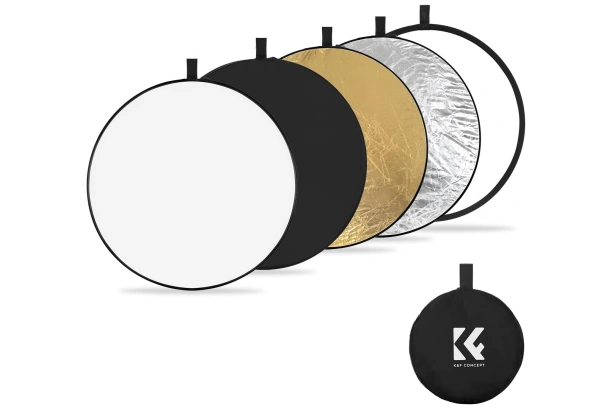
- What We Like
- Versatile Light Modulation
- Portable and Collapsible Design
- Durable Construction
- Enhanced Lighting Control
- What We Don’t Like
- Size Limitations
- Learning Curve
Elevate your photography with the K&F Concept 32” 5-in-1 Portable Photography Reflectors, a versatile tool designed to enrich your shooting experience. This comprehensive set features gold, silver, white, black, and translucent covers alongside a diffusion panel, offering a myriad of light effects to enhance your creative vision.
The translucent panel diffuses natural sunlight, while the white cover brightens shadows and softens light, the gold provides a warm fill light, the silver brightens both shadows and highlights, and the black subtracts light to craft captivating shadows. Crafted for convenience, this lightweight reflector swiftly folds into a portable size and includes a handheld storage bag, catering to photographers on the move.
Imbued with premium and durable quality, its high-grade fabric ensures longevity, while the smooth zipper adds to its overall sturdiness and practicality. Please note that this 5-in-1 reflector seamlessly integrates five photographic effects within one compact design, offering an all-encompassing solution for your photography needs.
- What We Like
- Robust and Adjustable
- Universal Compatibility
- Portability
- Stability and Flexibility
- What We Don’t Like
- Weight Consideration
- Learning Curve
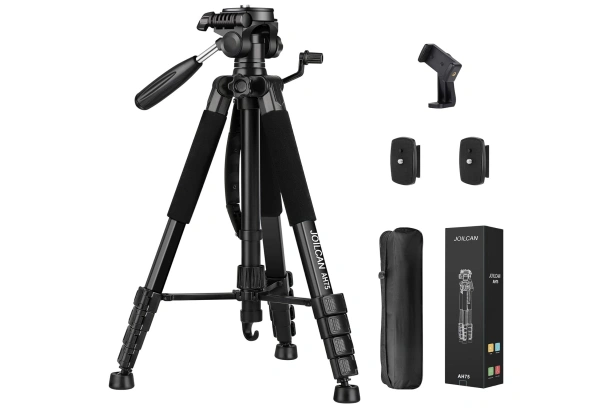
Experience unmatched versatility with the JOILCAN Lightweight and Adjustable Tripod, a sophisticated solution designed to elevate your photography endeavors. Effortlessly adjustable from 19″ to 74″ in seconds, this trapezoidal flap lock tripod seamlessly caters to various height requirements, ensuring adaptability in diverse shooting environments. Weighing a mere 3.15 lbs and folding to a compact 18″, this tripod offers unrivaled portability, complemented by a lightweight travel tripod carry bag for easy transportation.
Boasting exceptional durability and horizontal stability, its non-slip rubber feet and double sponge pads provide a secure grip, while the thicker tube enhances torsional resistance and anti-shaking properties. This professional-grade tripod is compatible with a vast array of devices including cameras (Nikon D3500, Fujifilm X-T200, Canon EOS 250D, Olympus, Panasonic), DSLRs, webcams, and smartphones like iPhone 14, Samsung Galaxy Note 9, and other models.
The 3-way pan head with 360° rotation ensures precise vertical, horizontal, and overhead photography, while offering superb stability and smooth operation for both photo and video recording. Unleash your creativity with this versatile, heavy-duty 74-inch tripod, perfect for a wide range of activities from family portraits to outdoor adventures, making it an essential tool for photographers and content creators alike.